Showing posts with label friendly plastic. Show all posts

Friday, June 21, 2013

The Parkettes of Richmond Hill: A Summer Odyssey


I've lived here for two years now. I keep trying to settle in. 
I've decided to really take the time to explore what my surroundings actually hold. 
I gathered a bunch of town literature from community centres nearby..
trail and park guide

One thing I picked up was a fold out map called A Guide to Parks & Trails in Richmond Hill.
three houses down from me

What really got me onto the park system here was this little thing down the street  from where I live:

What is that anyway?
Is this what they call a park? Who patrols it?
This is what I would call "a shortcut" but it's something "official" with those rules on the sign telling us how to use this space. Wow.  It's marked on the map with a faint sage green line, and no number so it's not an officially named space. 
So there are some quirks. 
Besides the official unofficial shortcut, Richmond Hill has kettle lakes, rivers, trails, parks and parkettes. 
Some parkettes are right beside parks. 
So what's the difference? 
There are 34 parkettes according to this map and this summer I am going to visit them all and report back.  


crow earrings

Right now I am getting my art together for the Aurora Farmers' Market in the morning...
flying pigs by request-verson #1

version #2
We can talk after.

Wednesday, January 23, 2013

3 friendly plastic designs with Gold Spectra


Lucky Dog design:  gold spectra head and body, mauve nose, pearl white dog bone, glass eyes

 Kitty Hears a Can Opener design:  gold spectra head and body, mauve nose, glass eyes


Chick of the Sea mermaid: gold spectra hair, purple bra and fishtail,
mother of pearl peach (underside)
oh oh!
Looks like I will need to find a substitute for the skin tone.

Probably will have to colour white fp with some kind of alcohol ink to make skin tones.
I don't see MOP peach in the current colour chart. 

Thursday, July 07, 2011

The Friendliest of Plans

Hello Plastic Masters aka those of you readers who like to make things with friendly plastic.


I've been thinking about all the stuff I've made over the years - this being year TWENTY - of making things with Friendly Plastic, and I am about to embark on the next logical step with the stuff.

I am starting to compile downloadable files full of plans and pictures of my designs so you too can give Friendly Plastic a whirl.


There are a few of us out there teaching it, but there are still many many people looking for information on how to use it. We all do it differently and I think it's time for me to teach other would-be plastic masters how I do it.

I'm deciding what format i'd like to present this work in and of course I have to dissect my things and get them into teachable/learnable shape. It's an exciting thing for me and I hope to hear from some of you about what you'd like to see and also about how you would liek to get this material.

Please feel free to comment here on the blog or email me personally at katieargyle@yahoo.ca.

I'll keep you posted on my progress. I hope to have something by the fall.

-- Katie

Thursday, April 29, 2010

Friendly Plastic Experiments with Jones Tones aka mylar backed foils

I bought these foils a few months ago to try them on my Friendly Plastic sticks. I am about 99% sure this is THE foil that is used on the surface of the friendly plastic I buy. Ages and ages ago I came across this foil in a card shop. They were selling it as a way to embellish cards - just write on the foil and it would transfer to the paper. I think I bought it but never tried it.


I went on the hunt for this stuff just after Christmas and came
across it as Jones Tones Foil. When I saw it in the card shop
this wasn't what it was called.

My supplier had several colours so I ordered one of everything they had. Ah the joys of Christmas money. Today I did a few experiments with it. The only info I could find online was how to use it with polymer clay: roll out the clay, lay the foil on top, dull side down, then burnish it onto the surface. Rub fast and hard to create heat and then rip it off the surface like a band aid. Well I figured if I heated the friendly plastic that would activate/adhere the foil to it so that's what I tried. I got my heat gun and warmed the plastic up until it got really sticky then laid the foil onto it.

I then rubbed it to make contact on the whole stick. I then took the heat gun and aimed it over it for a count of ten along the length of the stick and then I let the whole thing cool down before I removed the mylar backing. I did rip fast most times but not always. I don't think it matters as much with the friendly plastic as it really seems to bond.


What dawned on me was when I was adding the foil over top of the existing foil, I would get a broken pattern. I actually found this very intriguing. It makes the surface more sophisticated adding depth and interest.

When I placed the foil on the back of the plastic, the side without the foil, pretty much the whole sheet stuck and I then had a new sheet of plastic with both sides having colour.

This too is interesting to me.


My next experiment will be trying to add patterning with the foil to another existing colour. For example, adding silver stripes to royal blue friendly plastic. Or gold hologram dots to green friendly plastic. I'm also wondering if I can add the foil to my work after I've already cooked up my design. Could I add the hologram pattern to a finished design and then take it off so it leaves a dusting of colour behind? I used to inset hologram sheets into friendly plastic ages ago and I remember them losing their patterning under the heat. They were really sensitive so I am curious to see how they hold up in the oven. Anyway I'll know soon enough, as will you dear reader. As will you.

Monday, April 05, 2010

Alcohol Ink + Friendly Plastic test = success.


There was a time that you could get flat yellow friendly plastic.
Happy were the fairy wands, bee stripes and bright yellow suns I made from it.
Alas, I have only bits and pieces of it that I covet, saving them for use in a special project designated to happen "some day". Friendly plastic never had a metallic yellow to my knowledge. Why? I have no idea. Yellow must be hard to get right or must be unstable or something. Yellow, being a primary colour, would seem to be a colour you would expect to find in a friendly plastic artist's toolkit. It just ain't so. One day I was lamenting this fact to someone who had a solution for me. Make my own yellow.

What?

How?

An aside here: I am a friendly plastic purist. I have never been interested in trying to make my plastic look like glass or marble or whatever. I want it to be shiny happy plastic. It's what it is and I love it that way. I have never sought to change it ever so taking this advice was tough for me. But I love yellow and I need yellow and now I need brown too so I may as well change and adapt. As a human being this is what we've done for millenia and so I convinced myself that it would be okay.

So I set out on a search for Alcohol Ink.
Alcohol Ink faq here

I tracked it down at my local stamping supply shop, Heather's Stamping Haven, (here's her website, and her blog), and was thrilled to discover many colours. I kept myself to the plan (always tough) and purchased Lemonade to try to make yellow and upon consultation, Ginger to create brown. Sad to say but brown is another friendly plastic colour that's come and gone! BROWN?! yep. When I saw gold cobra go, well that was sad, but to think metallic brown would go too? It's still a mystery to me about the foils on the surface of fp (more on this in later posts as I may have found something to do about that as well!) but you have to cope with what you've got or innovate and I am innovating.

I opened the bottle and let the liquid land on the surface. The ink has a long needle-like nozzle/nose and I pushed it all around my plastic with the side of the nozzle while it was wet, and then if there was a spot where I thought there should be more I put more. I waited until it dried then tried to rub it off with my finger. A little came off so I let it dry longer. We're talking a couple of minutes. Nothing more. I chose flat metallic white as my base and the yellow really showed. I tried some yellow on a piece of orange copper and it made it a yellowy-orange. I liked it but it didn't change it enough for me for what I wanted to make this time round. But being able to slightly alter colours and get variations is very important to some of my plans for fp. Next I did the same process with Ginger on flat metallic white. I did get a good brown. Yay!

And for my first try I made these things with my altered whites...


Yellow Easter Chick


Pin and Earrings


Monkey Juggler Pin


So the colour seemed permanent on the plastic before I cooked it up in the toaster oven. After it baked I tried to rub it off again and it didn't budge. I'm not sure how it will do over time. I don't know if the colour will fade or flake or what. I was using sharpie markers on friendly plastic ages ago and when I first wrote on the surface it seemed great. Permanent. But overtime it faded to a purpley tone and it sort of spread out, it diffused within the plastic somehow and so the writing that seemed so legible when I first made it turned fuzzy and faded. We'll see what happens to the ink as time goes by. So far, so good. The heat of the oven didn't obviously change it.

Now the only thing is the plastic breaks white. Like the foil, the ink sits on the surface and when disturbed the plastic's main colour shows through. It's not necessarily bad, or anything, you just have to figure out how to use it to its best advantage. I suspect with the ink I could brush it into the cracks/seams where I find the white especially distracting. I am sure it would work and IF THAT WORKS... well. It never ends, one idea leads to the next, and it's why I am glad to be making fp things again.

Carp Easter Market - temperature 31C!

I woke up on Saturday and saw this sign of spring. This little bird was about all that said "spring" that day. The bright neon red sun that rose in my rear view mirror as I headed west to Carp looked more like one of the glorious mid-summer sunsets I have seen sitting on my favourite rock at Britannia Beach than an early spring morning sunrise.

It was spectacular.

No pics as I was driving with both hands.

The crowds were happy as they walked the market site. The summery weather made everyone relaxed and at ease, unless you started thinking about how weird it was but never mind that!

Let's enjoy the day for what it is. It could have just as easily been a snowstorm, or freezing rain. The market vendors were mostly in the agricultural hall, a few signed on to be outdoors (they really threw the dice and got lucky!) and a few of us, (myself included), were in the market building's rotunda.


Long shadows of a bright summer sun in early spring. Sandals. No socks.


Main gate to the site of the Carp Farmers' Market


Mural painted on the side of the agricultural building commemorating the Carp Fair, held every September.


During set-up the sun shone brightly putting everyone in a great mood. Here's the market building with its gorgeous new signage. I was in this location for the Easter market.


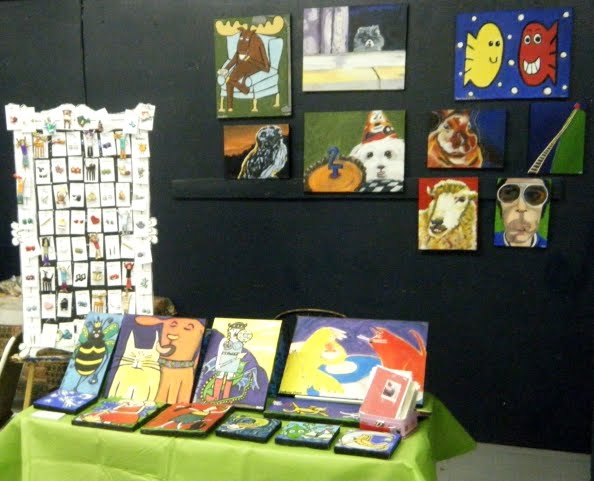
My space inside was small and sort of round. I had a minimal display here. My regular market booth will have three walls which will be full of friendly plastic things, paintings and mirrors.

Here is the Carp Farmers' Market calendar for 2010.

We open May 8th for the regular season. The hours are 8am to 1pm every Saturday.


My table top of paintings.


A fine selection of friendly plastic, some old favorites and some new designs. I have re-discovered my medium in getting ready for this show. More on that later.


Entitled "Love" this little painting is my current favorite.


I adore his toothy grin. He is more caressing the boat than crushing it, though, like when a cat licks you and then suddenly sinks his teeth into your flesh, you never really know what this green guy will do.

Wednesday, December 23, 2009

I'm a City of Ottawa Art teacher...wanna take a course??

This winter I will be teaching at the Nepean Creative Arts Center in Bells Corners, down the street and to the left of the Wallacks on Stafford Road.

Since my interests are many, my skills are pretty varied too. I'm going to list my courses below, but you can get all the information and the registration info from the City of Ottawa Recreation Guide here.

All my classes will be held at the Nepean Creative Arts Center, 35 Stafford Road (Bells Corners) Nepean.


ADULT CLASSES


Paint Your Pet's Portrait
Course Code: 410908
Thursdays Jan 14 - Mar 25
7-9:30pm

Just like it sounds. Bring in a photograph of an animal you wish to paint, your current pet, a deceased pet, a pet you'd love to have, or any animal really that you have an affinity for, and lets try to capture their essential nature on canvas. We'll learn how to see the form, what is essential to convey about this creature and how to transfer from a photo to a canvas. It will be necessary to talk about what to do with all that space around the main character as well, so thinking about the backgrounds will also be part of this class.


Drawing and Acrylic Painting for Beginners
Course Code: 410890
Wednesdays 7-9:30pm
Jan 13 - Mar 24

We'll explore drawing techniques, composition and design. From this start we will create the foundation of what we will paint. Using our drawings for the basis of our painting compositions we will then transition to acrylic paints learning about colour and design as we progress.


Print, Paint and Draw
Course Code: 410843
Fridays 7-9:30pm
Jan 15 - Mar 26

Combine drawing, printmaking and painting to make mixed media works that challenge the maker to go in directions they never considered before. The combination of these media will bring about unexpected results. We will work with found objects, collage, monoprints, collagraphs, drawing and painting mediums to create out work.


Taking a Line For a Walk
Course Code: 410901
Wednesdays 1:30-4 pm
Jan 13 - Mar 24

Understand the simplicity and complexity of drawing a line. Study the characteristics, expressive qualities and types of line through various exercises and different mediums such as charcoal, ink, and graphite.


Fresh Start For Your Artwork
Course Code: 410896
Fridays 1:30-4 pm
Jan 15 - Mar 26

Learn from your previous beginnings or completed works of art in any medium. Through sharing artwork with other artists, participants learn to improve aspects of design, colour, composition, technique and communication.

ADULT & CHILD CLASSES

These two courses are for "the pair of you". One adult (19 yrs to 99+ yrs) plus one child.
In each class you will interact with each other, as for both classes the hands of the adult may be needed to help out the young one, and/or the young one will spur the adult on with their free thinking. It should be mutually beneficial for the two of you and the group as whole.

Registration for these courses is made separately ie. the adult registers themselves and the child is registered under a different code.


Stop Motion Video with Puppets *Two workshops offered this winter*
(Adult + 1 Child between the age of 9-12)

Jan 16 - Feb 13 5 week workshop


Course Code Child: 410879

Course Code Adult: 410869
Saturdays 10am -12 pm

also

Feb 20 - Mar 27 5 week workshop

Course Code Child: 410882
Course Code Adult: 410885
Saturdays 10 am-12 pm

We will start by creating our characters from scratch using simple wire armature for the basic body shape. To this we will add sponge for flesh and muscle and nylon to cover the form and make a skin. We will then use fabrics to create the clothing (or the pelt if it's an animal or a bird or an alien) and to bring out details of the character. Once the posable puppets are created we will give them a home by making a backdrop for them to move within. Paper, cardboard and found objects will complete this scene. From here the class will be dedicated to shooting the frames to create our short animation. We may have time to create individual films or it may be a class collaboration. This will be decided as the class progresses.


Funky Plastic Jewelry *Two workshops offered this winter*
(Adult + 1 Child between the age of 9-12)

Jan 16 - Feb 13 5 week workshop


Course Code Child: 411059
Course Code Adult: 411071
Saturdays 1-3 pm

also

Feb 20 - Mar 27 5 week workshop


Course Code Child: 411084
Course Code Adult: 411o77
Saturdays 1-3 pm

I will be teaching two forms of plastic jewelry: friendly plastic and shrink plastic. Each of these mediums use different artistic skills, painting and drawing for the shrink art and sculpting for the friendly plastic. We will make brooches, magnets, earrings, bracelets and/or anklets. Plastic has been my life for almost 20 years. Let me show you what I know. Guaranteed to be a hoot.


Tuesday, December 01, 2009

New on Etsy: handmade ceramic buttons *fp inspired!*

I've been working on some fancy button designs for the past few months and here's what I've come up with. They are all, indeed, fancy and very attention-getting. I think they're real traffic-stoppers and can you imagine having one of these on your coat? Or your winter hat? Or some fancy handbag you've made lovingly by hand or machine...
Etsy
Buy Handmade
prissyfistspress

For those of you who know me as one who lives for friendly plastic, you can see that many of my designs and the style of my friendly plastic work continues into clay.

Funny how that goes.
Hand of the maker and all that.

But being that friendly plastic melts in hot water, or in hot hot direct sun, and although it'd make a gorgeous button, clay is ultimately more practical for this purpose.

So check out my buttons on Etsy and tell me what you think. I'll be putting more work up for sale in the weeks ahead.

Monday, June 15, 2009

Post #300 - the simple beauty of friendly plastic

I have a thing for alphabets, type styles, fonts, text, letter shapes and plain old words. One of the best uses for friendly plastic has been in the simple construction of my sign. I firmly believe your sign should reflect your medium. Painters should have a painted sign. Ceramic artists a clay sign. Textile artists something sewn. It's a very effective way to show what you do. What I didn't realize is that there are lots of people out there who want their name in friendly plastic too. I've only made one but there's a young artist in my hometown (Keely you know it's you!) who made the names of all her friends after I showed her how to work fp on a visit here a few years ago.

A sign can use up a lot of plastic and this is the primary reason I don't make these for others. I made my own business name from snappers worked very slowly and minimally. I also chose the colours that just don't do it for me (hello burnt orange blechh) or those sticks that I had a lot of like light blue.

I didn't try to disguise the joins or do anything fancy. I just like the plastic like it is. I rarely try to change the surface. I'm a friendly plastic purist. I enjoy the sheer plasticness of it and the round shapes and the pillowy surface a melted stick gives you. There is much to love here without colouring or twisting or marbling or pressing it into a mold.

I did use one of my favorite colours for my name: metallic red on red. It is SO vibrant. I swear between metallic red on red, metallic royal blue on black, and metallic purple on black, and even metallic white on white, I will never leave this medium. There is nothing to compare to it. I know my friendly plastic blog has been short on friendly plastic, and this with the resurgence of fp on the scene, but first things first and getting my fine art diploma was at the top of my to do list. With graduation fast approaching I am looking ahead to re-discovering fp and making some of the things that have crossed my mind. Most of these are BiG ThInGs. With 4 rubbermaid bins of bits more or less full I've got a lot of raw material to dig into, and with three years of art school a lot more ideas of how to approach this stuff. Fun.


Monday, April 13, 2009

Illustration Friday: Fleeting

rise above 8"x16" acrylic, wire, glass & friendly plastic on canvas
He had a hard time concentrating on work when fleeting thoughts of escaping his humdrum routine took him away to dream of other things...

Friday, March 06, 2009

As promised: Friendly Plastic on set

I last wrote about starting an animation using Friendly Plastic as my set and here are a few jpgs to see what I mean.

Here's the interviewer and his guest. Note the furniture. I melted FP onto
thin masonite and used the heat gun to fuse it to the material. I made the legs by sandwiching two pieces together and using the heat gun to fuse them, and I attached them to the table top and the chair bottom by melting a piece of fp onto the surface and pressing my already-made legs into it and holding it until the legs fused into place.

Macaroni is my guest star. He looks good here.

Here's another still, showing my spaghetti audience.


BTW I made my interviewer from what I learned in the Graeme Patterson workshop I was at this fall. Here's the post I made showing the construction of a puppet.

And here's Graeme's website. Take a look. I was lucky to have had the chance to learn from him.

Sunday, March 01, 2009

Friendly Plastic New and Old

I was cleaning the living room and discovered a couple of friendly plastic things. Here's a lady relaxing on a chaise lounge skritching a very pampered kitty. This piece is about 14" wide by 7" tall, all one piece. She's really fun and I guess I still have her because I really liked her. Every once in a while I put something away instead of putting it up for sale. I might make her part of a larger piece, maybe place her in a hand-printed background or something.

And here's something from my plastic box. I carry my sticks with me when I am out at the farmer's market and I keep them in a see-through Tupperware box with a lid. I remember I had my plastic underneath my chair and the sun came around and all it took was a few minutes of direct summer sun and this happened! A whole bunch melted together. You can see one of my handmade stands in there and a tag that I attach to my work all melted together. Sometimes I can pry this apart. This one is a write off. I will have to use it for filler for bigger pieces.


My current use for friendly plastic is as material from which I am making a set for an animation. I have indian red chairs and a table, all based on the set from Inside the Actor's Studio. Once I have it all set up I'll take some jpg's so you can see it.